
Albums
Manage album designs and settings.
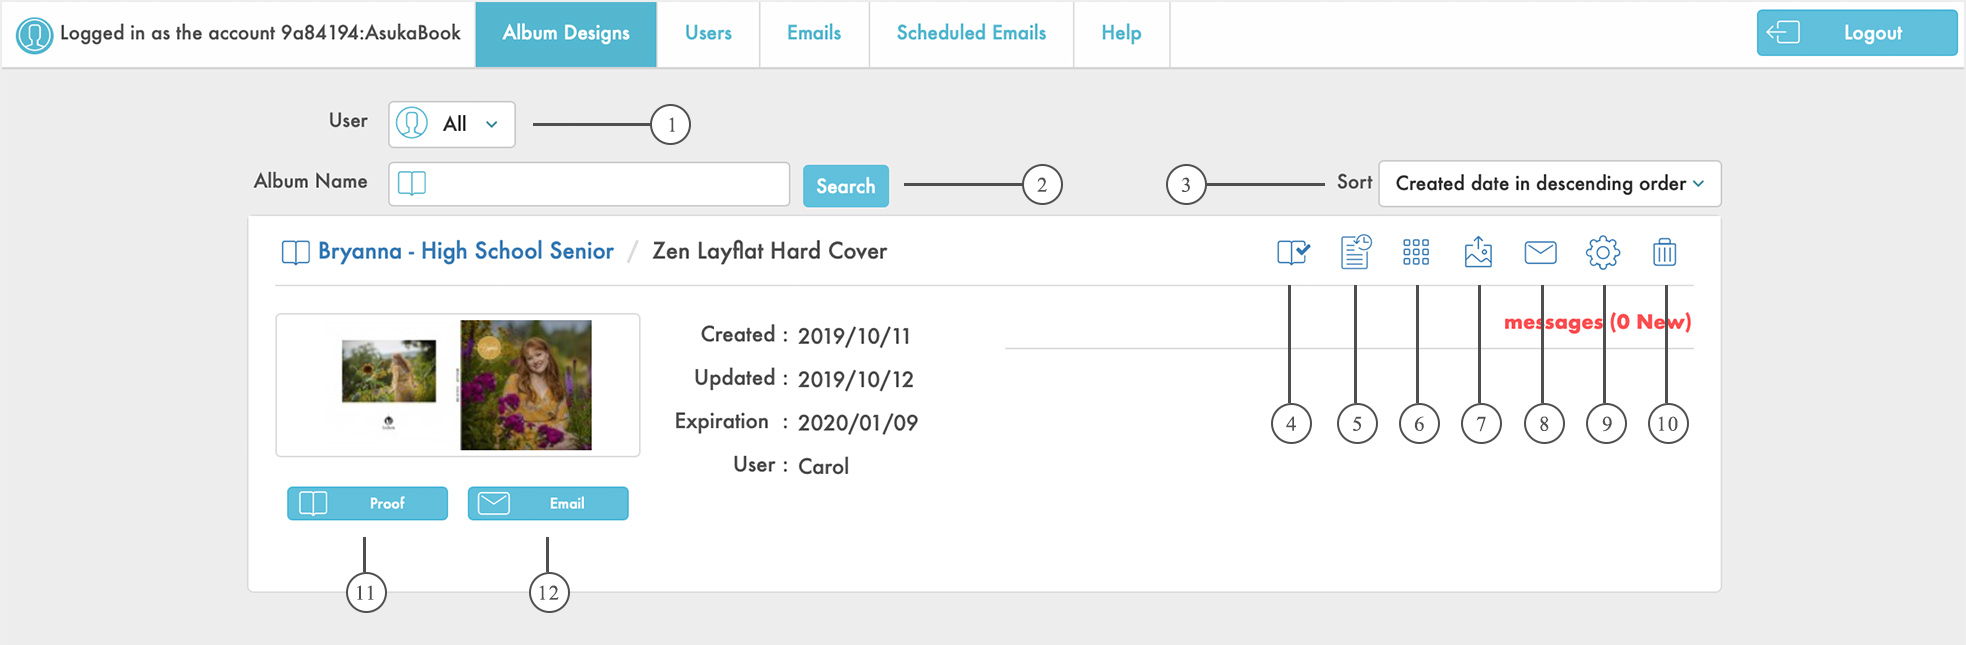
- Filter album projects by User.
- Search albums by name.
- Sort album projects in ascending/descending order based on comment date, creation date, updated date, or expiration date.
- Album approval. Your client can approve the design when proofing. You may also approve, or undo the approval of, a design.
- View slideshow download and online slideshow viewing history.
- View replacement images.
- Upload replacement images.
- Email client.
- Access album settings.
- Delete the album from the AlbumLayout Proofing website.
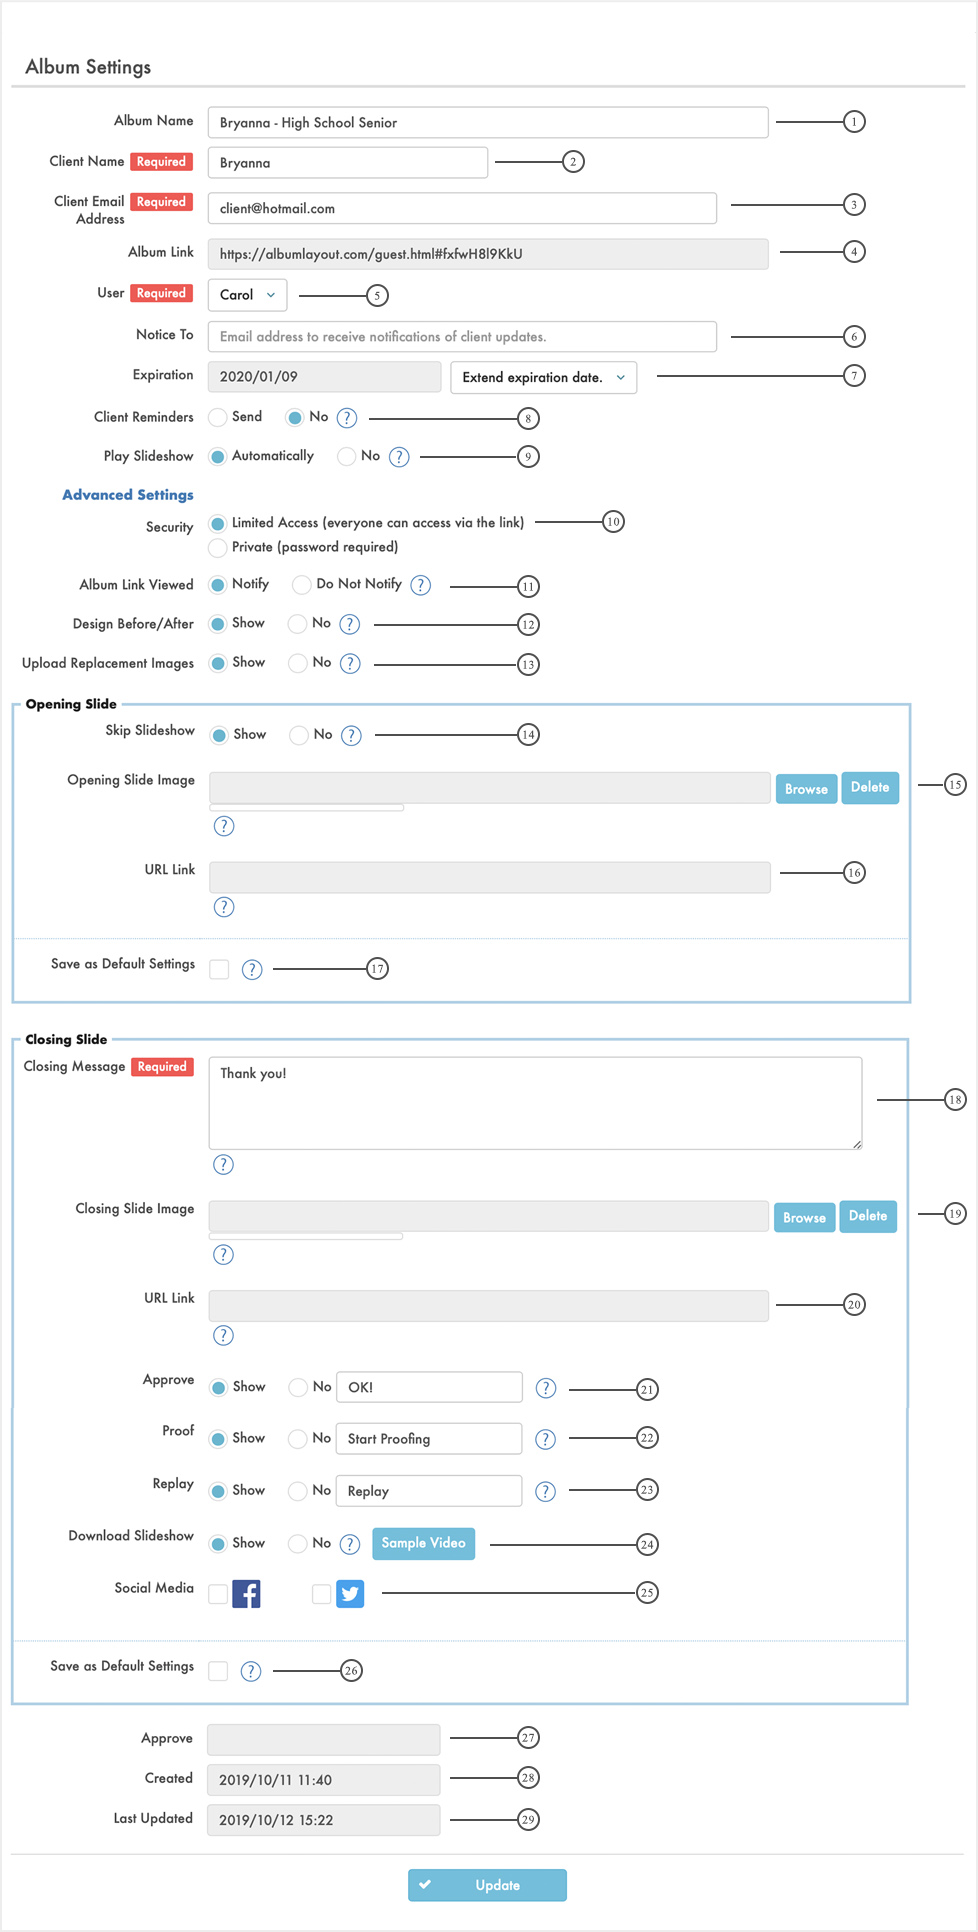
- Enter a name for the album.
- Enter client's name.
- Enter client's email address.
- A link to client proofing will be automatically generated.
- Set security settings. If "Private" is chosen, please enter a password. The client will need to enter the password to access the album link.
- Assign a user to this project.
- Enter the email address to send album notifications and client comments to.
- Select to send automated reminders to the client to proof and approve their album or not. This feature can be turned off at any time.
- Select to notify the user when the client views the album.
- Enable client to view the design prior to design changes, in addition to the new design updated via AsukaBook Maker or your AsukaBook account.
- Allow client to upload desired replacement images to include in the design. These images will be accessible via your Album Designs list view.
- Automatically play slideshow, or open slideshow options, when your client visits the link.
- Add an option to skip to the end of the slideshow.
- Insert opening slide image to display at the beginning of the slideshow.
- Link the opening slide to open a URL in a new web browser tab.
- Save these settings as default settings for all of your albums.
- Add copy to display at the end of the slideshow.
- Insert closing slide image to display at the end of the slideshow.
- Link the closing slide to open a URL in a new web browser tab.
- Add an option for your client to approve their album at the end of the slideshow. This option will be removed after album approval.
- Add an option for your client to proof the album at the end of the slideshow. This option will be removed after album approval.
- Add an option for your client to replay the slideshow.
- Add option for your client to download a video file of the slideshow. Download options will only be available after album approval.
- Add social media share options that will be available at the end of the slideshow. These will allow clients to share the slideshow of their album and will only be available after album approval.
- Save these settings as default settings for all of your albums.
- Approval date will be automatically entered.
- Date AlbumLayout was created.
- Date AlbumLayout was last updated.
- AlbumLayout link is valid for 90 days. You may extend the expiration date for up to an additional 90 days. Once an album is approved, the expiration date will be automatically set to 30 days after approval and cannot be extended.