
Features, Views & Settings
Manage albums & album settings, account users, create and customize email templates, and schedule emails.
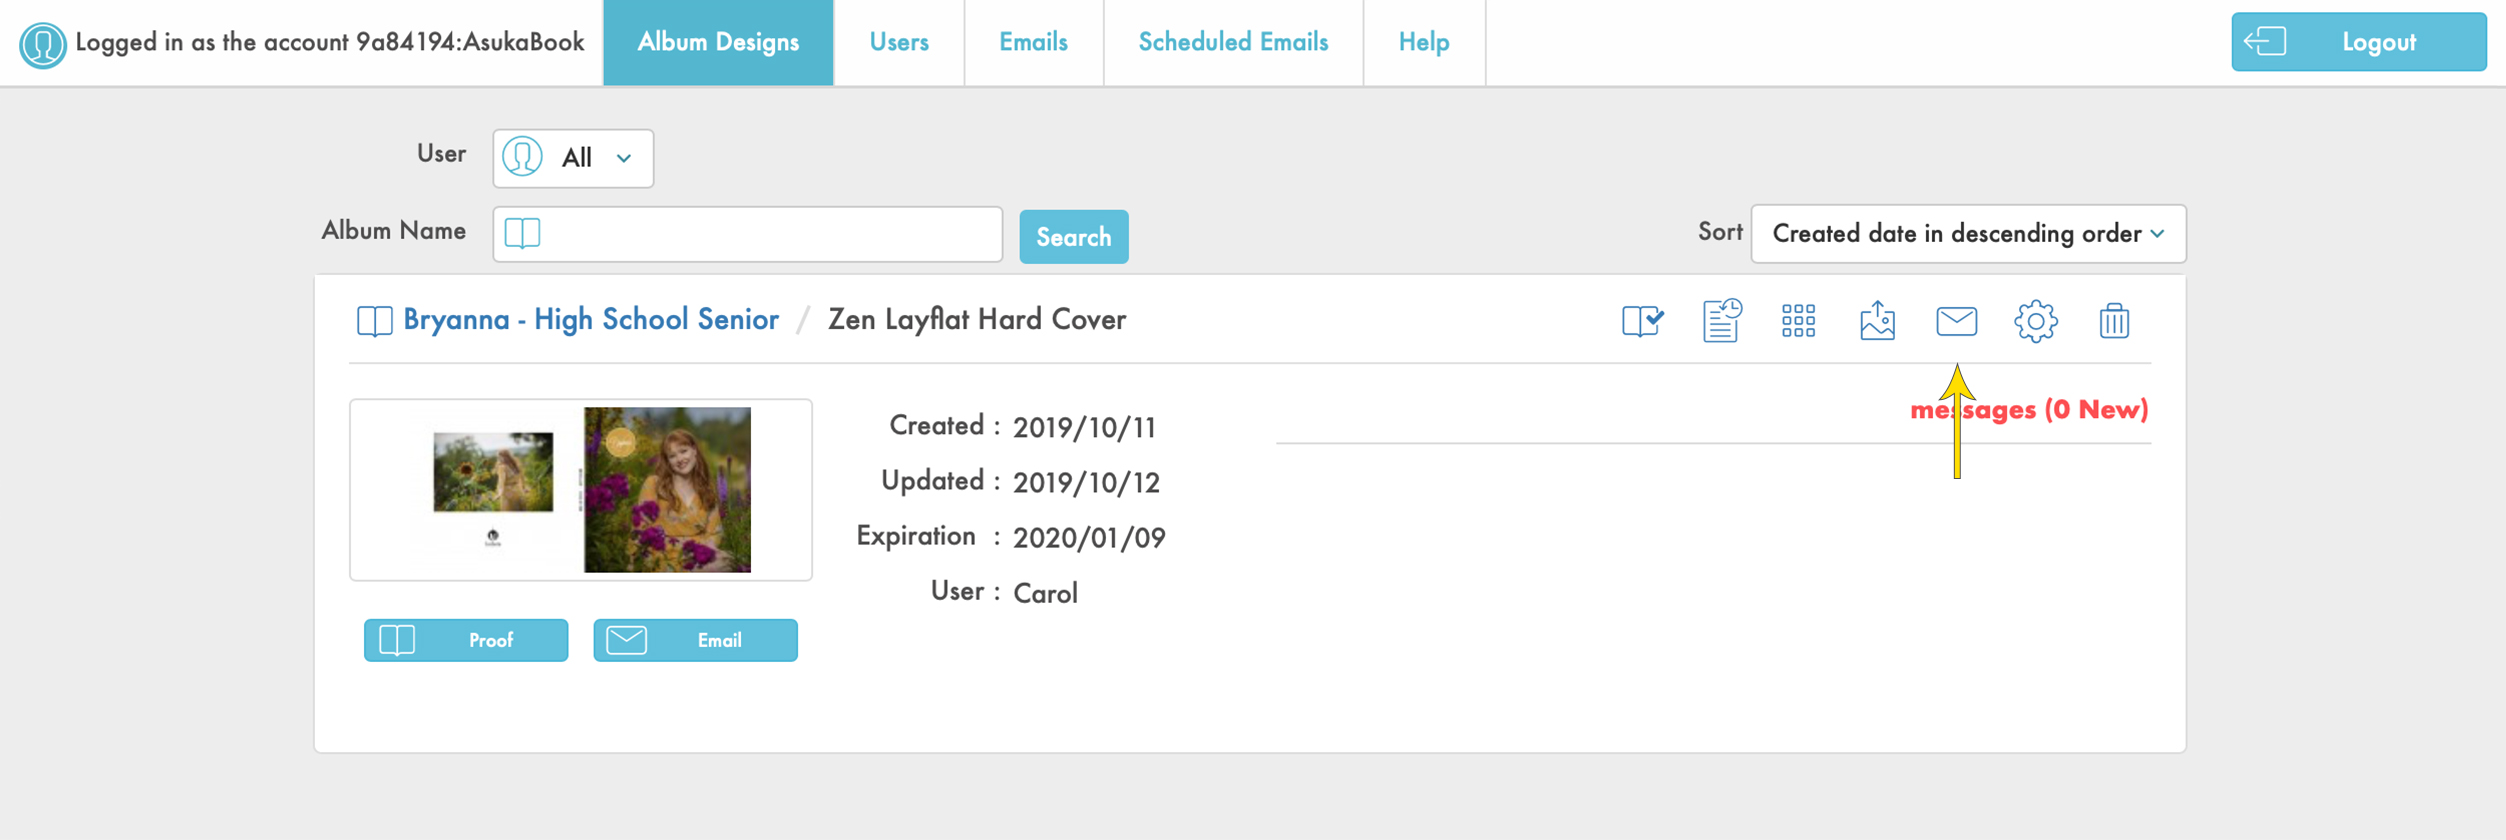
View and manage all album designs synced with the AlbumLayout website.
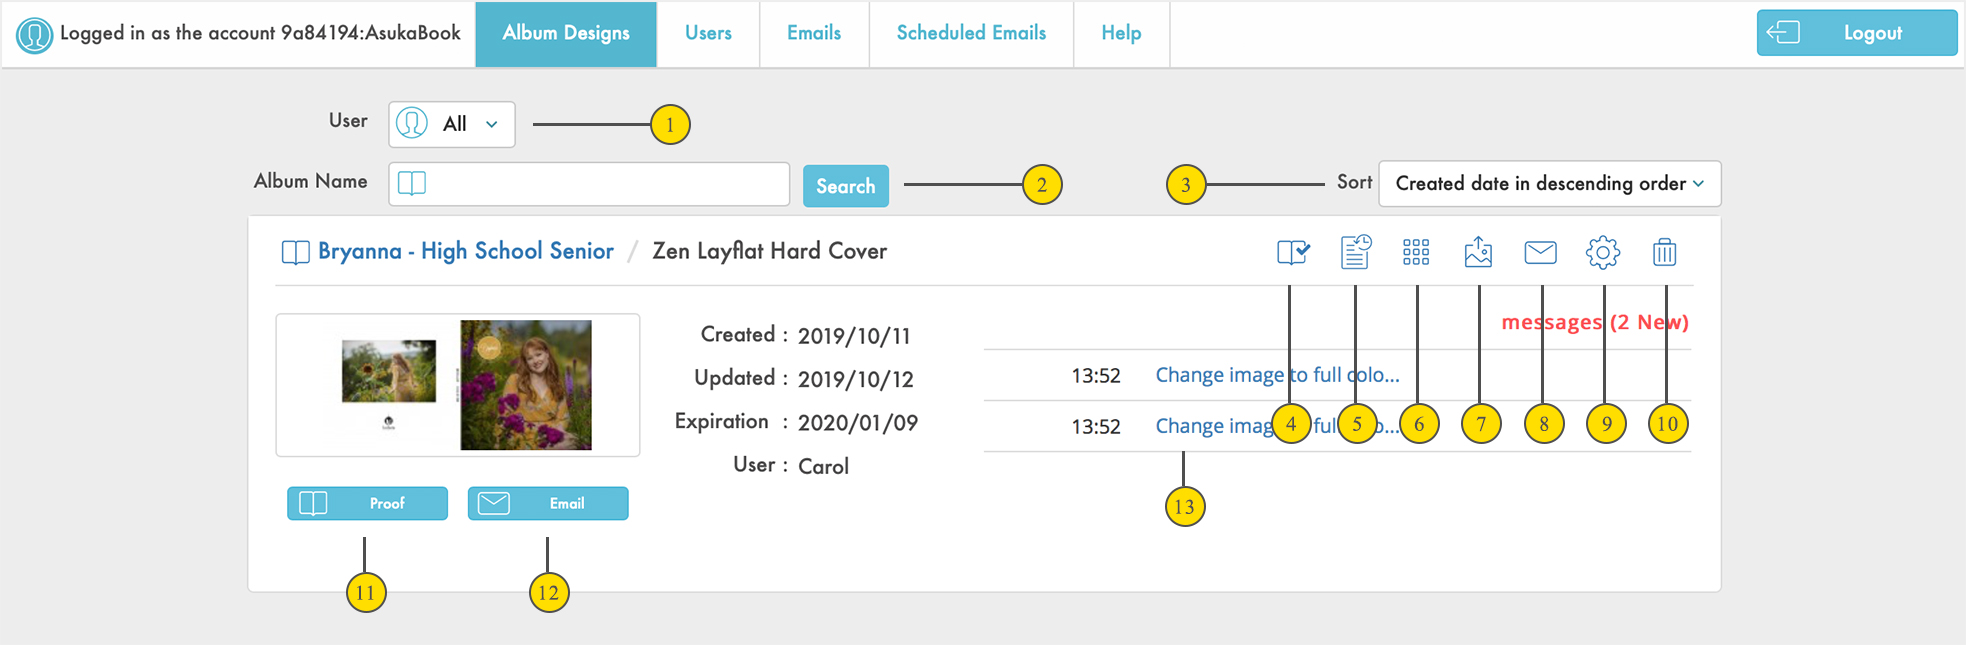
- Filter album projects by User.
- Search albums by name.
- Sort album projects in ascending/descending order based on comment date, creation date, updated date, or expiration date.
- Approve or revoke album layout approval.
- Access mail, slideshow viewing and download history.
- View replacement images.
- Upload replacement images.
When Image Replacement feature is enabled, it allows the User and/or Client to upload additional images not currently used in the album layout to be chosen as an alternative/replacement. Enabled or disabled this feature in the Album Settings and User Settings page. Users can access the Replacement Images from the Album Designs view. - Email client.
- Access Album Settings.
- Delete the album from the AlbumLayout Proofing website.
- Open the Proof view.
- Email client.
- Comments.
Read submitted comments.
Add and manage multiple account users.
STEP 1 - Add a User
Click on the Add User button to add users to your account. 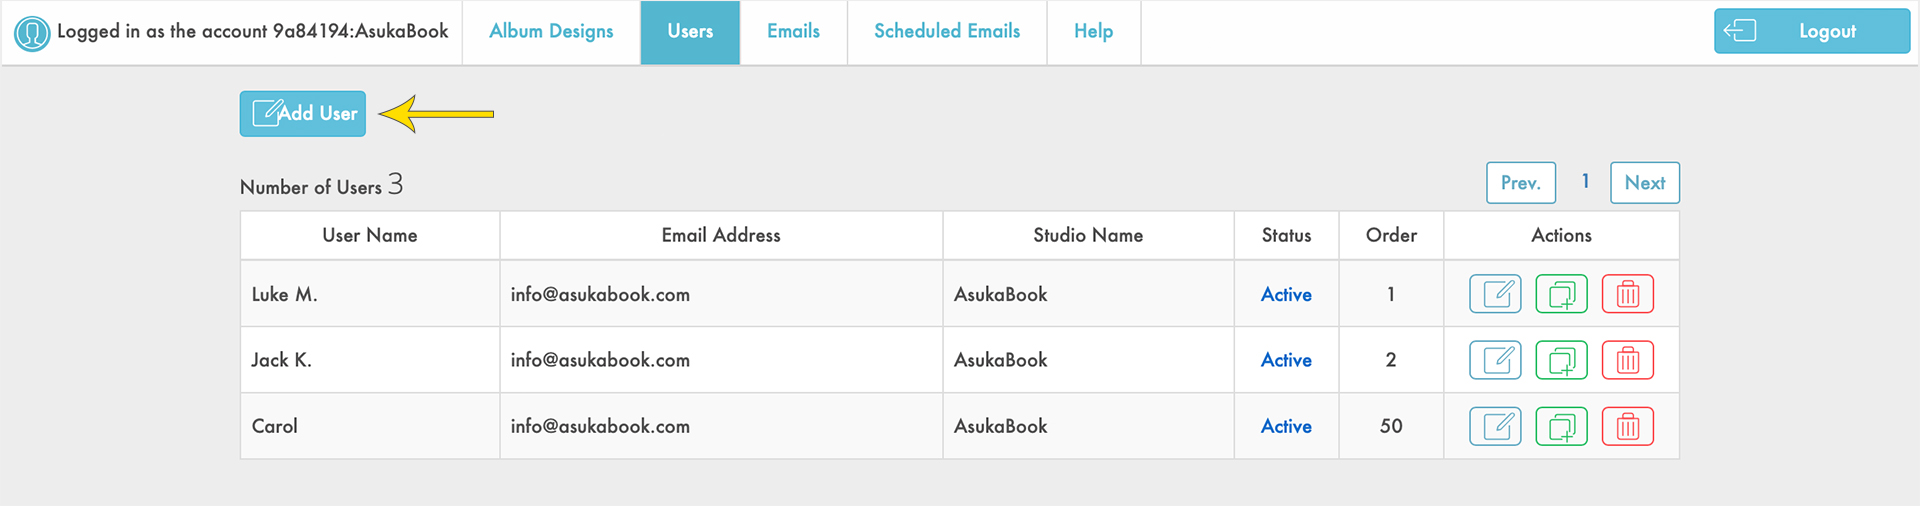
STEP 2 - Select User Settings
Setting descriptions can be found below.
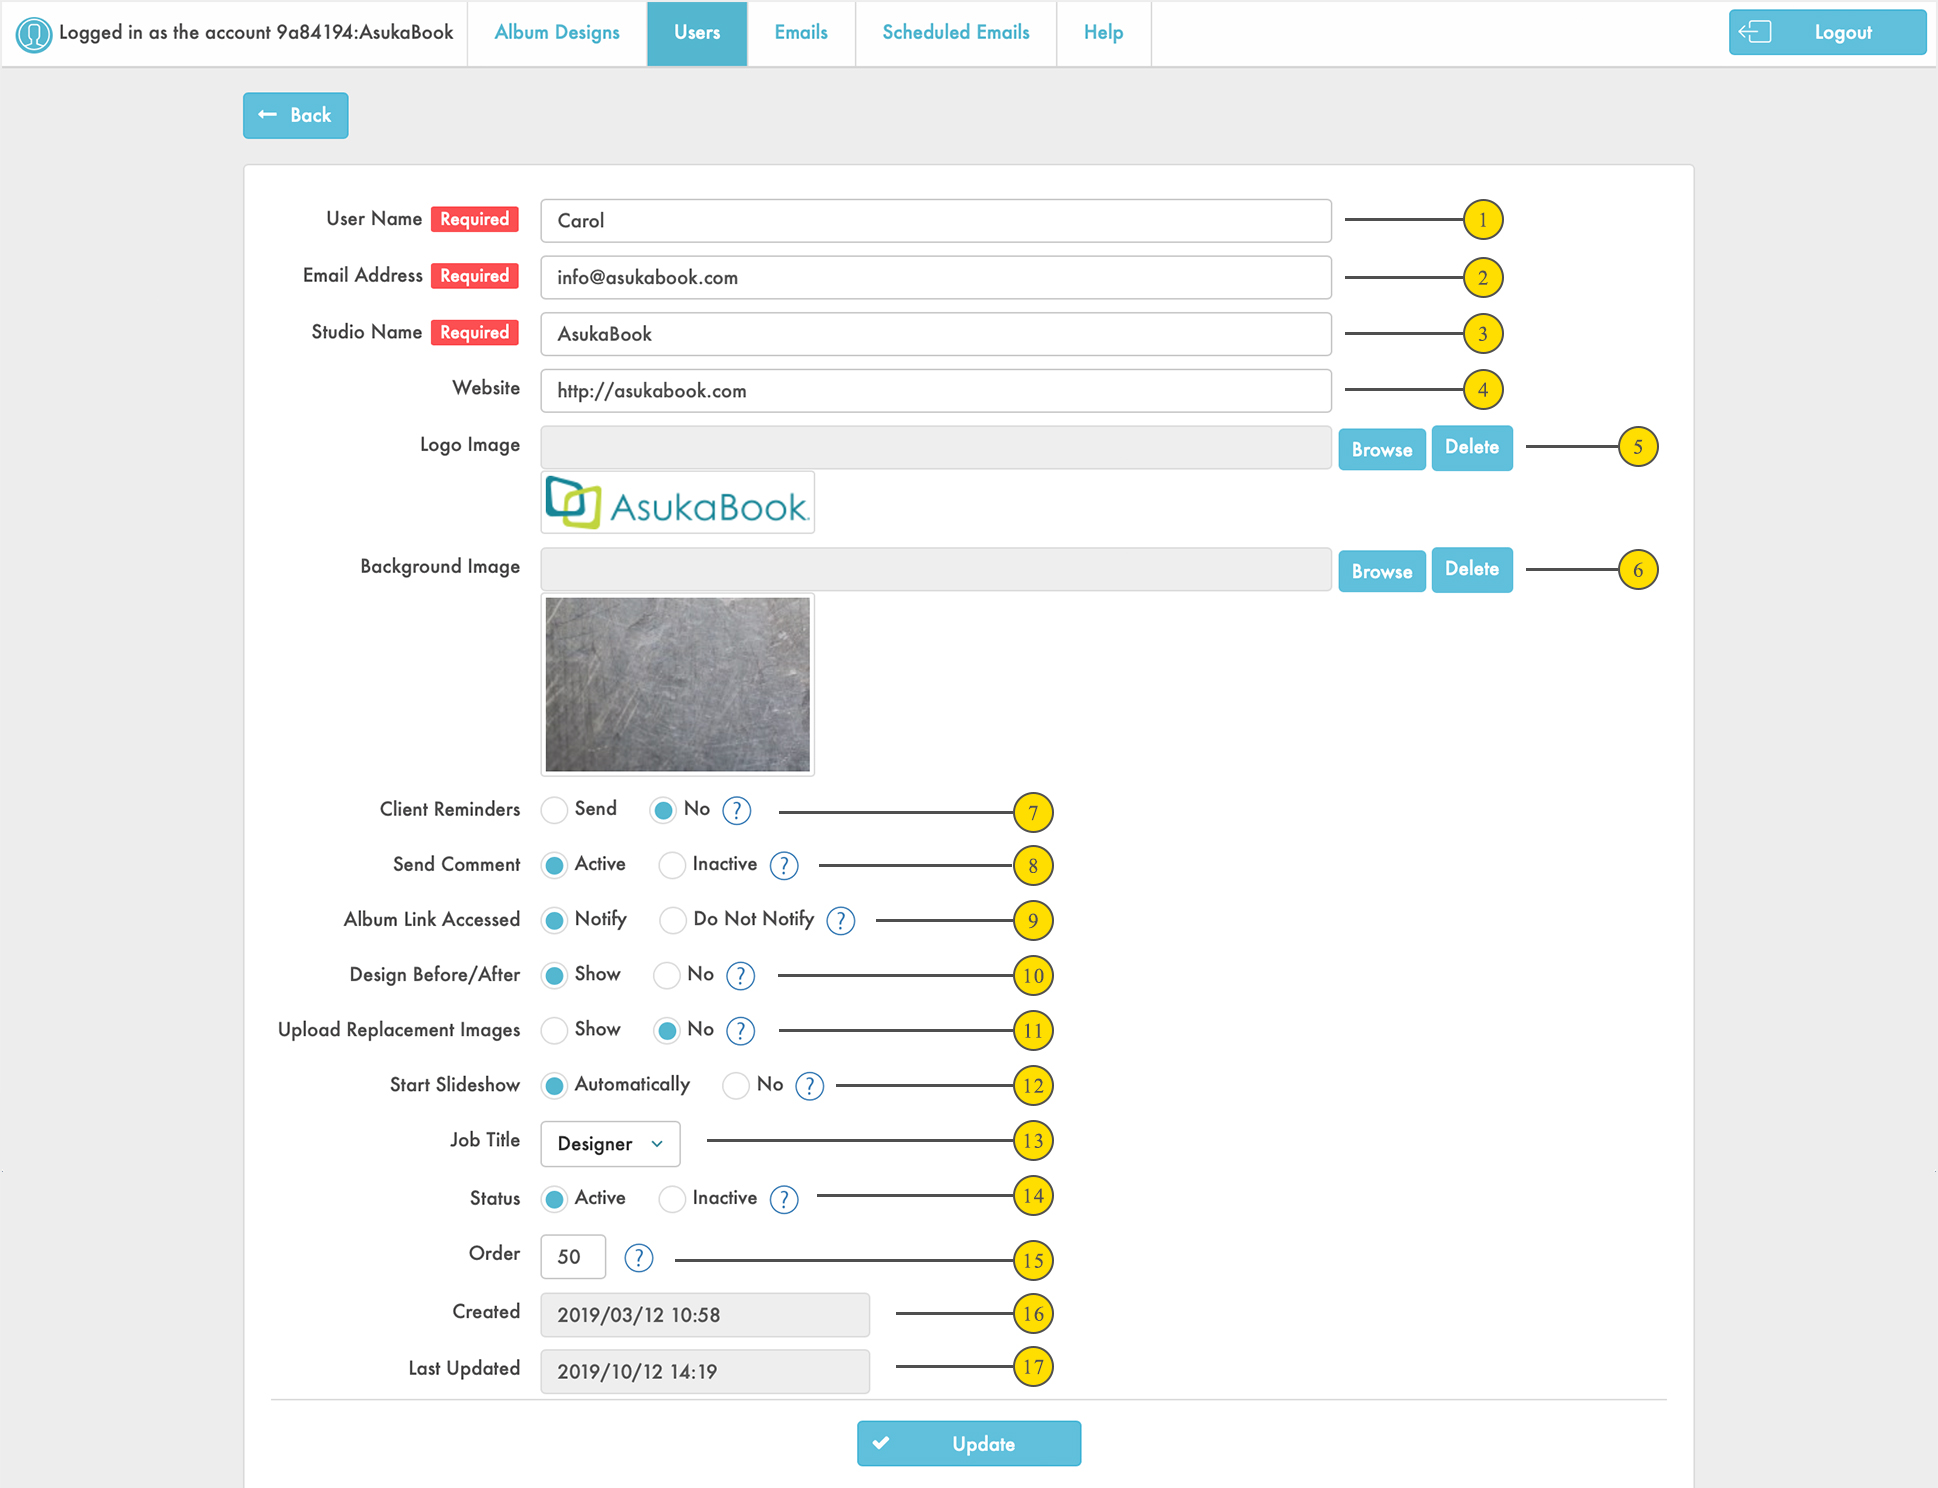
- User's name.
- User's email address.
- Studio name you want associated with this user. This information may be included in album information assigned to this user, as well as in email correspondence to clients.
- Your website's URL.
- Add your studio logo to be visible on client's Proof View of albums assigned to this user.
- Add a background image to be displayed in the background of the client's Proof View. If no background image is uploaded, the default background will be gray.
- Automated email reminders are sent to your client until the layout is approved.
- Allows your client to make and send you comments via the Proof View.
- Get an email notification when your client views the album link.
- Allows your client to view the before and after of the layout.
- Allows your client to upload replacement images which will be accessible in the Album Designs view.
- Automatically plays slideshow when your client clicks on the album link.
- Assign a job title from list provided or create your own.
- Make User active or inactive.
- Set user's priority level between 1 and 50. This is the order in which the users will be listed on the user list.
- Creation date is automatically set to the date and time the user is created.
- Last updated date is automatically set each time the user account is updated.
Preset email templates are provided for the basic proofing steps of ready, updates, reminders, and approval notifications. You may use the preset templates as provided, create new ones by duplicating and/or customize existing ones.
Email Templates
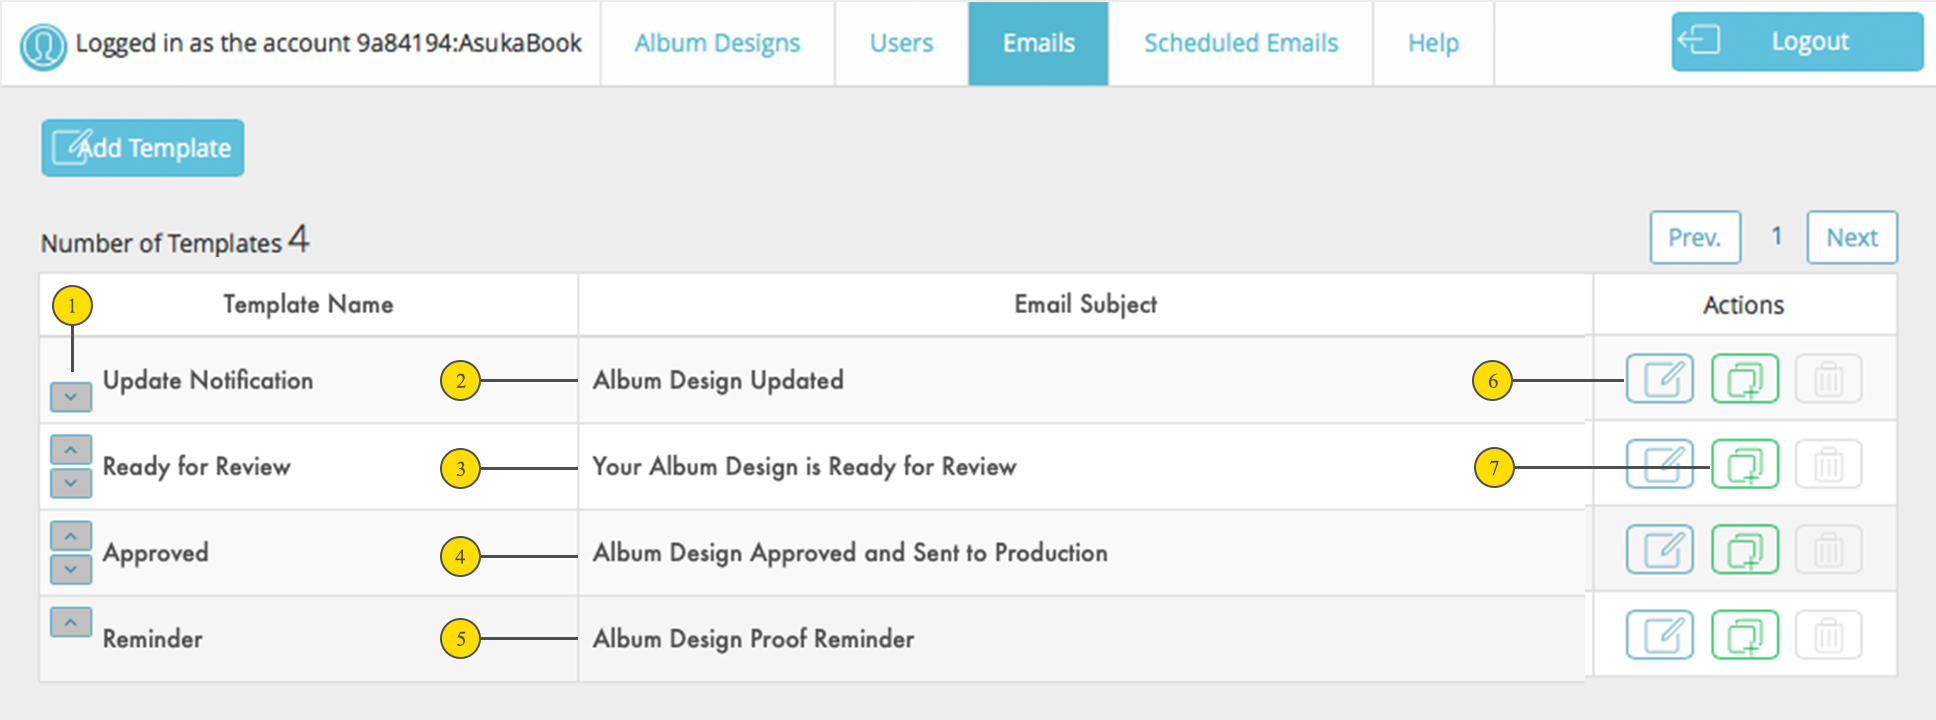
- Preset Email notifying your client that their album layout has been completed and includes a link to view it.
- Preset Email notifying your client of any layout updates that have been made based on their comments.
- Preset Email notifying your client that the layout has been approved and confirms production status.
- Preset Email notifying your client of a pending status if the layout has not yet been approved.
- Edit and customize email template.
- Duplicate email.
- Change the order email templates are displayed.
Customize Templates
Click on the Edit or Duplicate icon for one of the Email templates to customize.
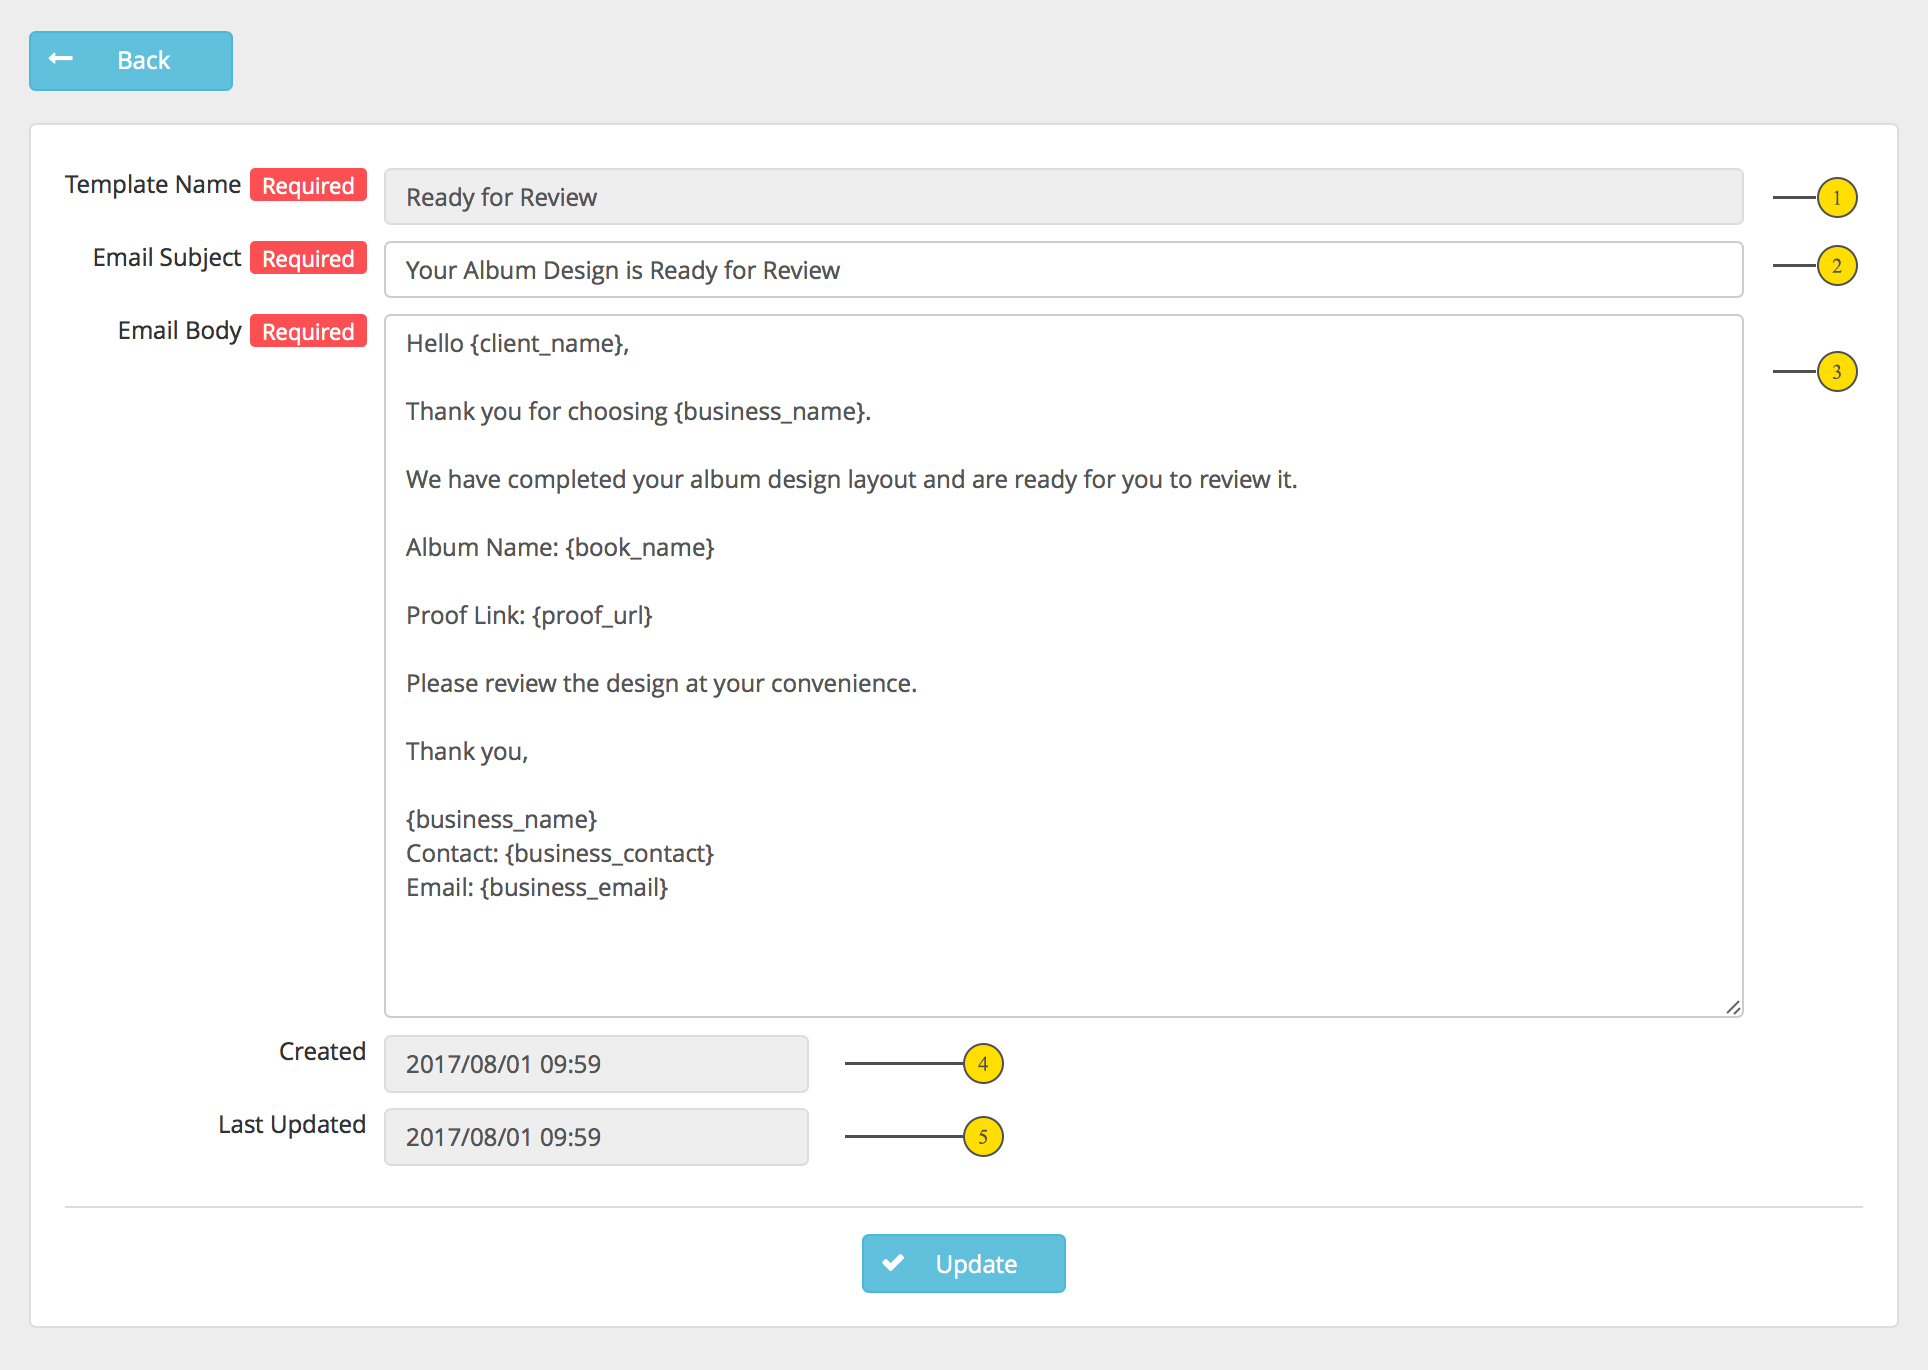
- Template name.
- Email subject line.
- Email content. You may edit the copy, but do not adjust the brackets and copy inside them as those will be automatically populated in the email.
- Date email was created.
- Date email was last updated.
Send your client an email on a future date and time.
Step 1 - Email Client
Click on the Email icon.


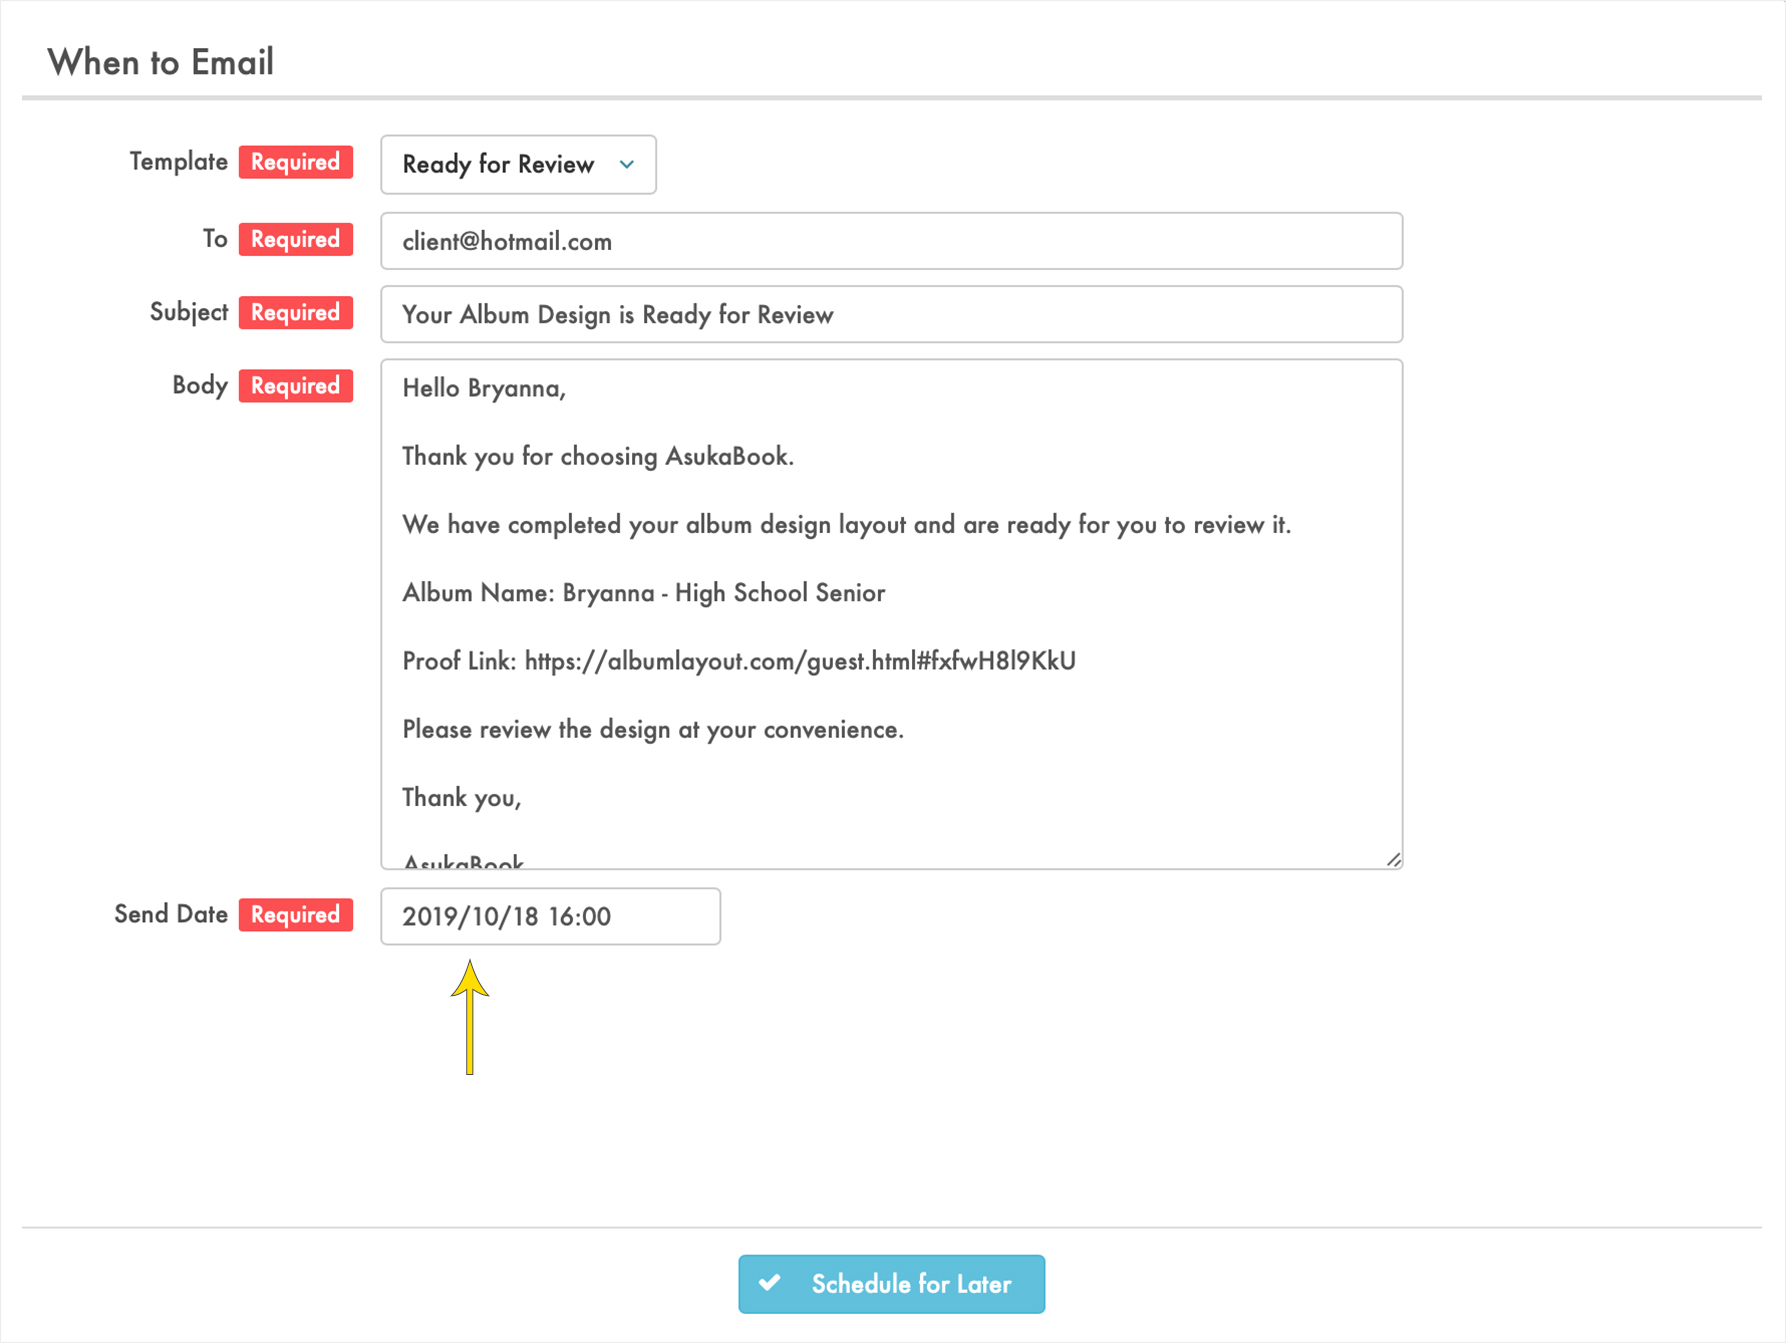
Step 2 - Schedule Email
- Select email template to be sent.
- Verify the email address or enter a new one.
- Click on the Select the date and time for scheduled email bullet and choose when to send the email.
View & Edit Scheduled Emails
- Click on Scheduled Emails to view list.
- Click on the Edit icon to make changes.
- Update any of the email details including the send date, then click the Schedule for Later button to save changes.
The Proof view allows you to add and send comments to your client, and download the slideshow once the layout has been approved.
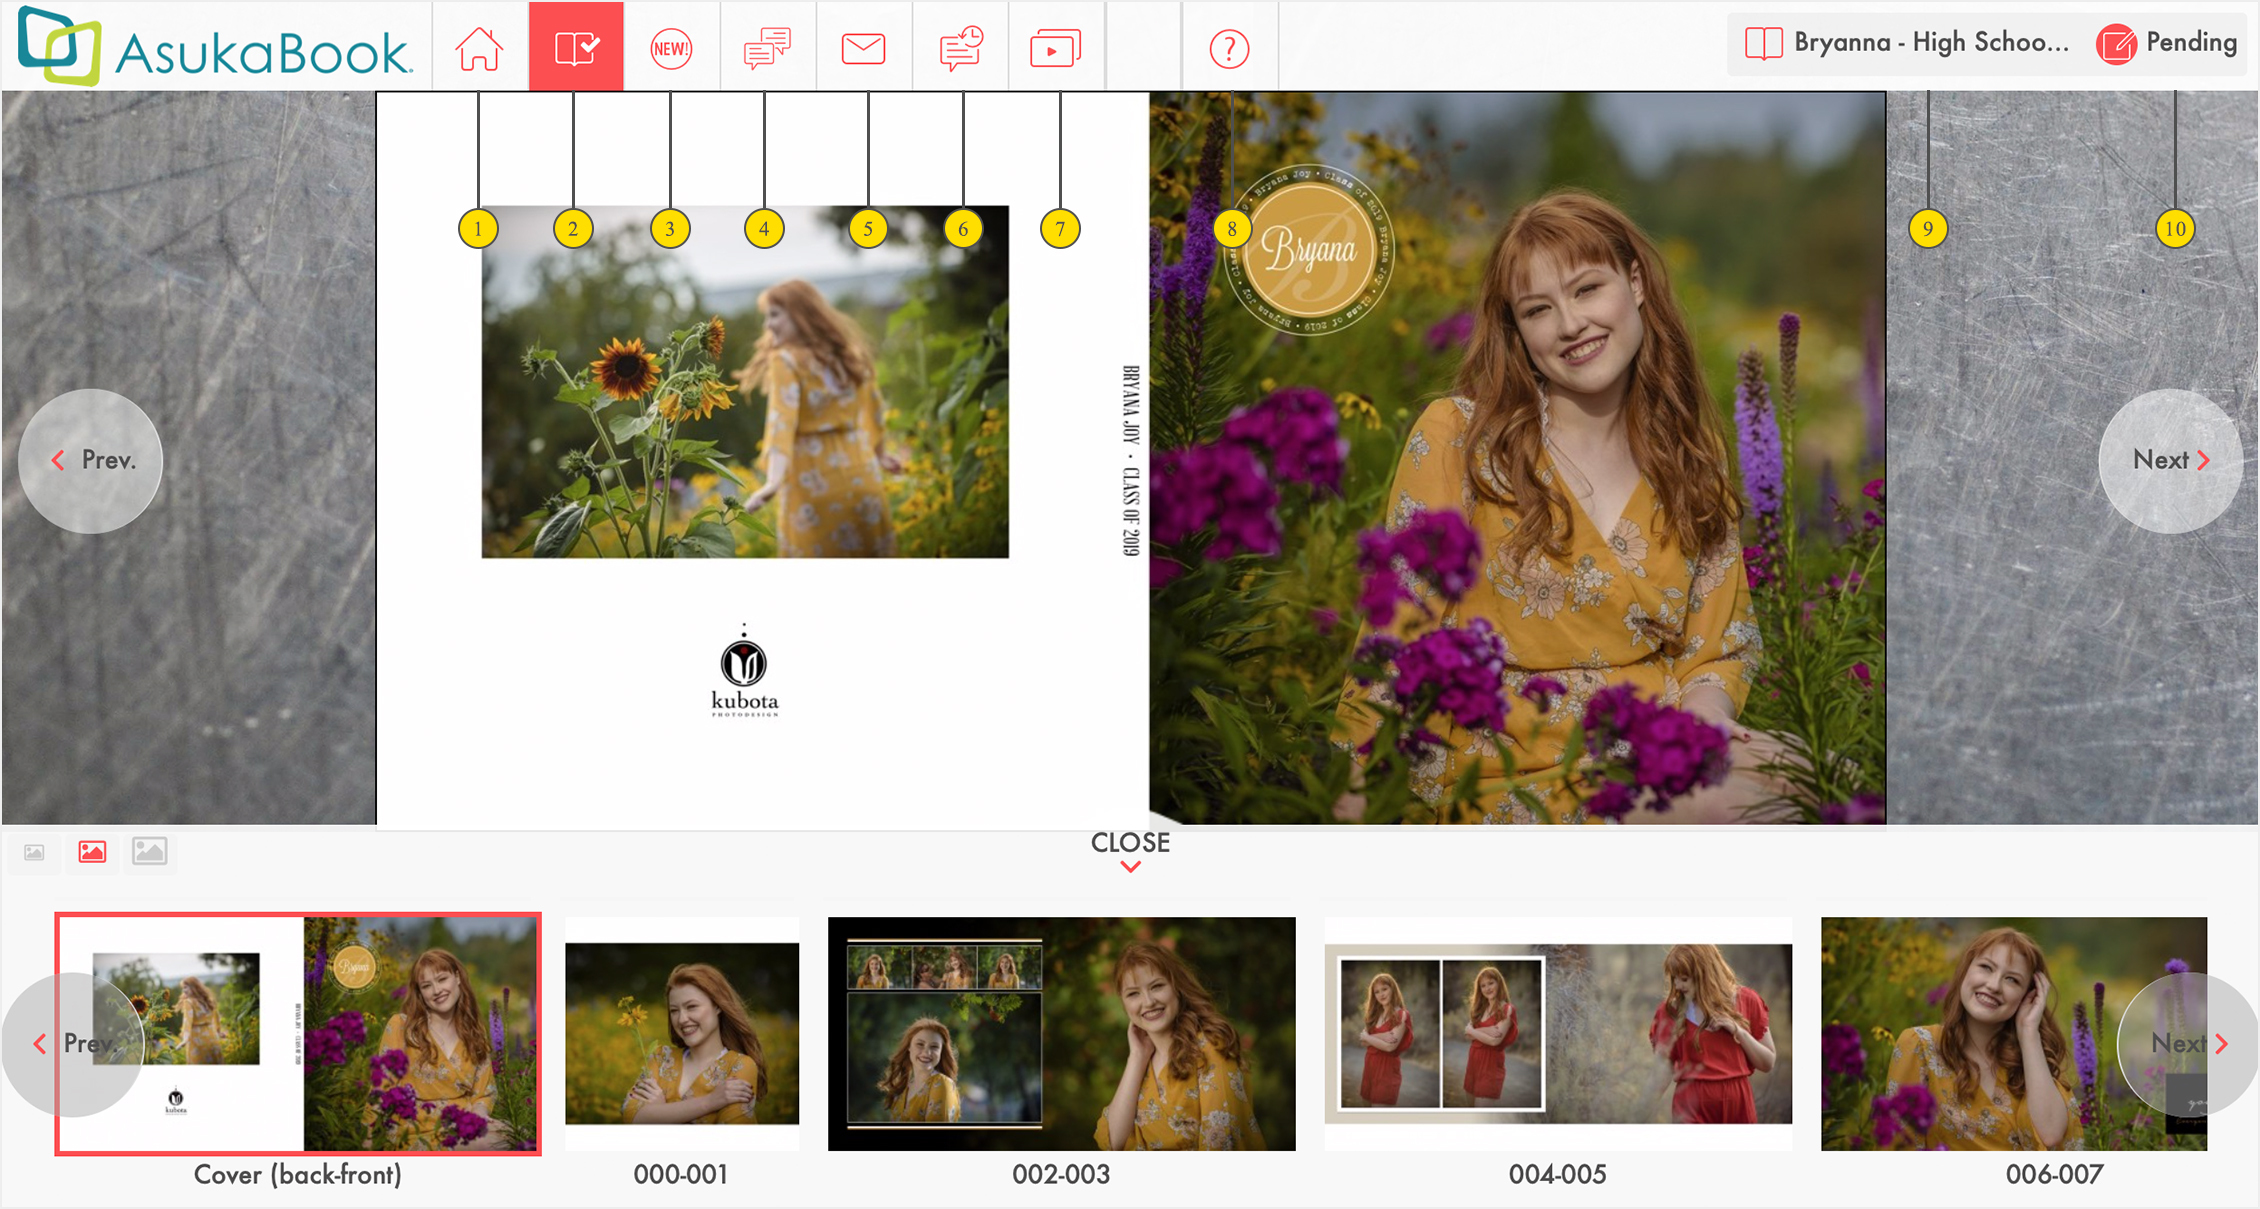
- Go back to AlbumDesigns View.
- Approve the layout.
- Read new comments.
- Add comments to send to client.
- Send added comments.
- View all added comments.
- View the design as a slideshow.
- Open the Online Help website.
- Album Name
- Album Layout Status